
Enhancing Web3 UX with Account Abstraction: Practical Steps for Developers to Implement Biconomy SDK V4
Blockchain technology has revolutionized the way we think about digital transactions, introducing levels of transparency, security, and decentralization previously unattainable. Yet, for all its advancements, user experience (UX) has often lagged behind. This is where account abstraction comes into play. In this article, we’ll delve into the concept of account abstraction, its benefits, and specifically how Biconomy leverages this innovation to enhance user transactions.
What is Account Abstraction?
Traditionally, blockchain transactions require a level of technical knowledge that can be a barrier for non-technical users: installing a Metamask wallet in your browser, understanding cryptography concepts like public/private keys, and using a Ledger wallet for increased security.
For the uninitiated, account abstraction might sound complex, but it's actually about making user's life easier. Think of it as upgrading from a manual transmission to an automatic; it’s all about making the drive smoother. Account abstraction allows users to interact with blockchain-based apps in a way that feels familiar and hassle-free, much like using a regular banking app.
Ethereum's ERC-4337 standard introduces a framework for account abstraction, enabling users to interact with smart contracts and dApps without needing to manage nonce, gas, or even hold ETH for transaction fees.
Biconomy’s Implementation of Account Abstraction

Biconomy, a leading player in the blockchain space, has developed a robust framework to utilize account abstraction for simplifying transactions. Their approach centers around two primary components: Paymaster and Bundler.
- Paymaster: The Paymaster component in Biconomy is crucial. It acts as a sponsor for transactions, enabling dApps to cover transaction fees for their users. This feature is particularly beneficial in enhancing UX as it removes the need for users to pay gas fees, thereby reducing entry barriers for new users.
- Bundler: The Bundler works alongside the Paymaster by aggregating multiple transactions into a single batch. This not only optimizes network congestion but also reduces the cost per transaction, making processes more efficient and cheaper. Bundler is an example of how Biconomy is innovating to manage transaction flows more effectively.
Getting Started with Biconomy SDK v4 and Web3Auth
To kickstart your journey with Biconomy and simplify the transaction process within your Web3 applications, you’ll want to begin with their robust SDK. The Biconomy SDK is designed to ease integration and enhance user experience by abstracting complex blockchain interactions. Here’s a step-by-step guide to help you get started with Next.js and WebAuth (social login solution).
You can directly fork the following repository or access the live demo of this Biconomy SDK v4 + Web3Auth tutorial.
Step 1: Setup Your Environment
Before integrating the Biconomy SDK, ensure that your development environment is ready. You'll need Node.js installed on your computer and Next.js project (using the app router in our demo).
Step 2: Install the Biconomy SDK
Open your terminal and run the following command in your Next.js project directory:
npm i @biconomy/account
Step 3: Create a Biconomy Account to Generate a Paymaster and Bundler
You need to sign up to Biconomy's dashboard to get a Paymaster API key and a Bundler URL before setting up the Biconomy smart account in our code.
Head to the Paymaster section, create a new Paymaster on the network of your choice and fill the Gas tank with some ETH.
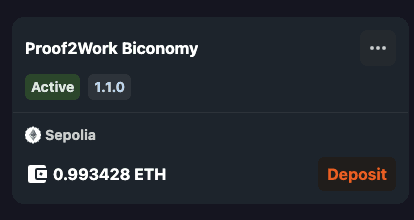
Don't forget to enable the Sponsored mode in the Paymaster settings if you want to pay for your user's fees.
Then create a new Bundler (you need to contact the Biconomy team if your project is on a Mainnet). You will find a Bundler URL that has this form:
https://bundler.biconomy.io/api/v2/{chain-id}/nJPK7B3ru.dd7f7861-690d-44bd-af80-6877f74b8f24
Step 4: Create the Web3Auth Social Login Modal
First, go to the dashboard of Web3Auth, sign up and generate a new pair of API key that you will store in the environment variable NEXT_PUBLIC_WEB3AUTH_API_KEY.
Next, add this code in your page.tsx to display the Web3Auth social login modal when user wants to sign in.
export const sepoliaConfig: EthereumPrivKeyProviderConfig = {
  chainConfig: {
    chainNamespace: CHAIN_NAMESPACES.EIP155,
    chainId: "0xaa36a7",
    rpcTarget: "https://ethereum-sepolia-rpc.publicnode.com",
    displayName: "Ethereum Sepolia",
    blockExplorerUrl: "https://sepolia.etherscan.io/",
    ticker: "ETH",
    tickerName: "ETH Sepolia",
  },
}

const web3auth = new Web3Auth({
  clientId: process.env.NEXT_PUBLIC_WEB3AUTH_API_KEY as string,
  web3AuthNetwork: "sapphire_devnet", // Web3Auth Network
  chainConfig: sepoliaConfig.chainConfig,
  privateKeyProvider,
  uiConfig: {
    appName: "Biconomy Account Abstraction",
    mode: "dark", // light, dark or auto
    loginMethodsOrder: ["apple", "google", "twitter"],
    logoLight: "https://web3auth.io/images/web3auth-logo.svg",
    logoDark: "https://web3auth.io/images/web3auth-logo---Dark.svg",
    defaultLanguage: "en", // en, de, ja, ko, zh, es, fr, pt, nl
    loginGridCol: 3,
    primaryButton: "socialLogin", // "externalLogin" | "socialLogin" | "emailLogin"
  },
})

await web3auth.initModal()
Step 5: Use Biconomy smart account to sponsor gas fees
This is the best use case of using a smart account: your users won't need any ETH in their wallet to pay transaction gas fees - your Paymaster with its gas tank will pay for them!
We first need to create a Signer and Provider from our Web3Auth object using ethers.js:
const ethersProvider = new ethers.providers.Web3Provider( web3auth.provider as any ) const web3AuthSigner = ethersProvider.getSigner()
Once we have a Signer, we can generate our Biconomy Smart Account using createSmartAccountClient:
export const createBiconomySmartAccount = async ( signer: ethers.providers.JsonRpcSigner ): Promise<BiconomySmartAccountV2> => { return await createSmartAccountClient({ chainId: parseInt(sepoliaConfig.chainConfig.chainId), signer: signer, biconomyPaymasterApiKey: process.env.NEXT_PUBLIC_BICONOMY_PAYMASTER_API_KEY, bundlerUrl: process.env.NEXT_PUBLIC_BICONOMY_BUNDLER_URL as string, rpcUrl: sepoliaConfig.chainConfig.rpcTarget, }) }
You will need the Paymaster API key, Bundler URL and the RPC endpoint url + chain ID of your selected network.
We can now use the sendTransaction method on our smartAccount to configure a gasless minting transaction (PaymasterMode.SPONSORED) on the Proof2Work NFT testnet contract.
const nftAddress: string = contracts.sepolia.p2wNft // smart contract address const contract = new ethers.Contract(nftAddress, MintContractABI, provider) const mintTx = await contract.populateTransaction.claim( userAddress, 0, 1, "0xEeeeeEeeeEeEeeEeEeEeeEEEeeeeEeeeeeeeEEeE", 0, [ ["0x0000000000000000000000000000000000000000000000000000000000000000"], 1, 0, "0xEeeeeEeeeEeEeeEeEeEeeEEEeeeeEeeeeeeeEEeE", ], "0x" ) // Build the transaction const tx = { to: nftAddress, data: mintTx.data as string, } // Send the transaction and get the transaction hash const userOpResponse = await smartAccount.sendTransaction(tx, { paymasterServiceData: { mode: PaymasterMode.SPONSORED, }, }) const { transactionHash } = await userOpResponse.waitForTxHash() const userOpReceipt = await userOpResponse.wait()
Setup 6: Use Biconomy smart account to allow users to pay for gas fees with their ERC20 tokens
Using ERC20 tokens to pay for gas fees is another great feature of Biconomy's smart account. To do that, you need to set the paymaster service mode to PaymasterMode.ERC20 and specify the preferred ERC20 token to pay for fees.
const erc20Address = contracts.sepolia.p2wToken const erc20ABI = ["function claim() public "] const contract = new ethers.Contract(erc20Address, erc20ABI, provider) const claimTx = await contract.populateTransaction.claim() // Build the transaction const tx = { to: erc20Address, data: claimTx.data as string } // Send the transaction and get the transaction hash const userOpResponse = await smartAccount.sendTransaction(tx, { paymasterServiceData: { mode: PaymasterMode.ERC20, preferredToken: contracts.sepolia.dai, } }) const { transactionHash } = await userOpResponse.waitForTxHash() const userOpReceipt = await userOpResponse.wait()
You can see the complete code in this Github repository.
Final note
Embracing account abstraction is likely to be a pivotal moment in the broader adoption of blockchain technology. With companies like Biconomy at the helm, coupled with web3 wallets solutions including social login, we’re set to see blockchain become as easy and ubiquitous as using any everyday app. Other products are worth being considered to implement Account Abstraction in our dApp; it would like to give a special mention to Alchemy, Etherspot, and Stackup.
It’s a thrilling time in the tech world, and staying informed and engaged is key to making the most of these advancements!